Build your first bowtie diagram
In this tutorial, we’ll show you how to create a new diagram, add, edit, delete, and clone elements. We’ll also show you how to rename a diagram.
Step 1: Head to the Project Menu and click + PROJECT. Enter a name for your project, then click SAVE. 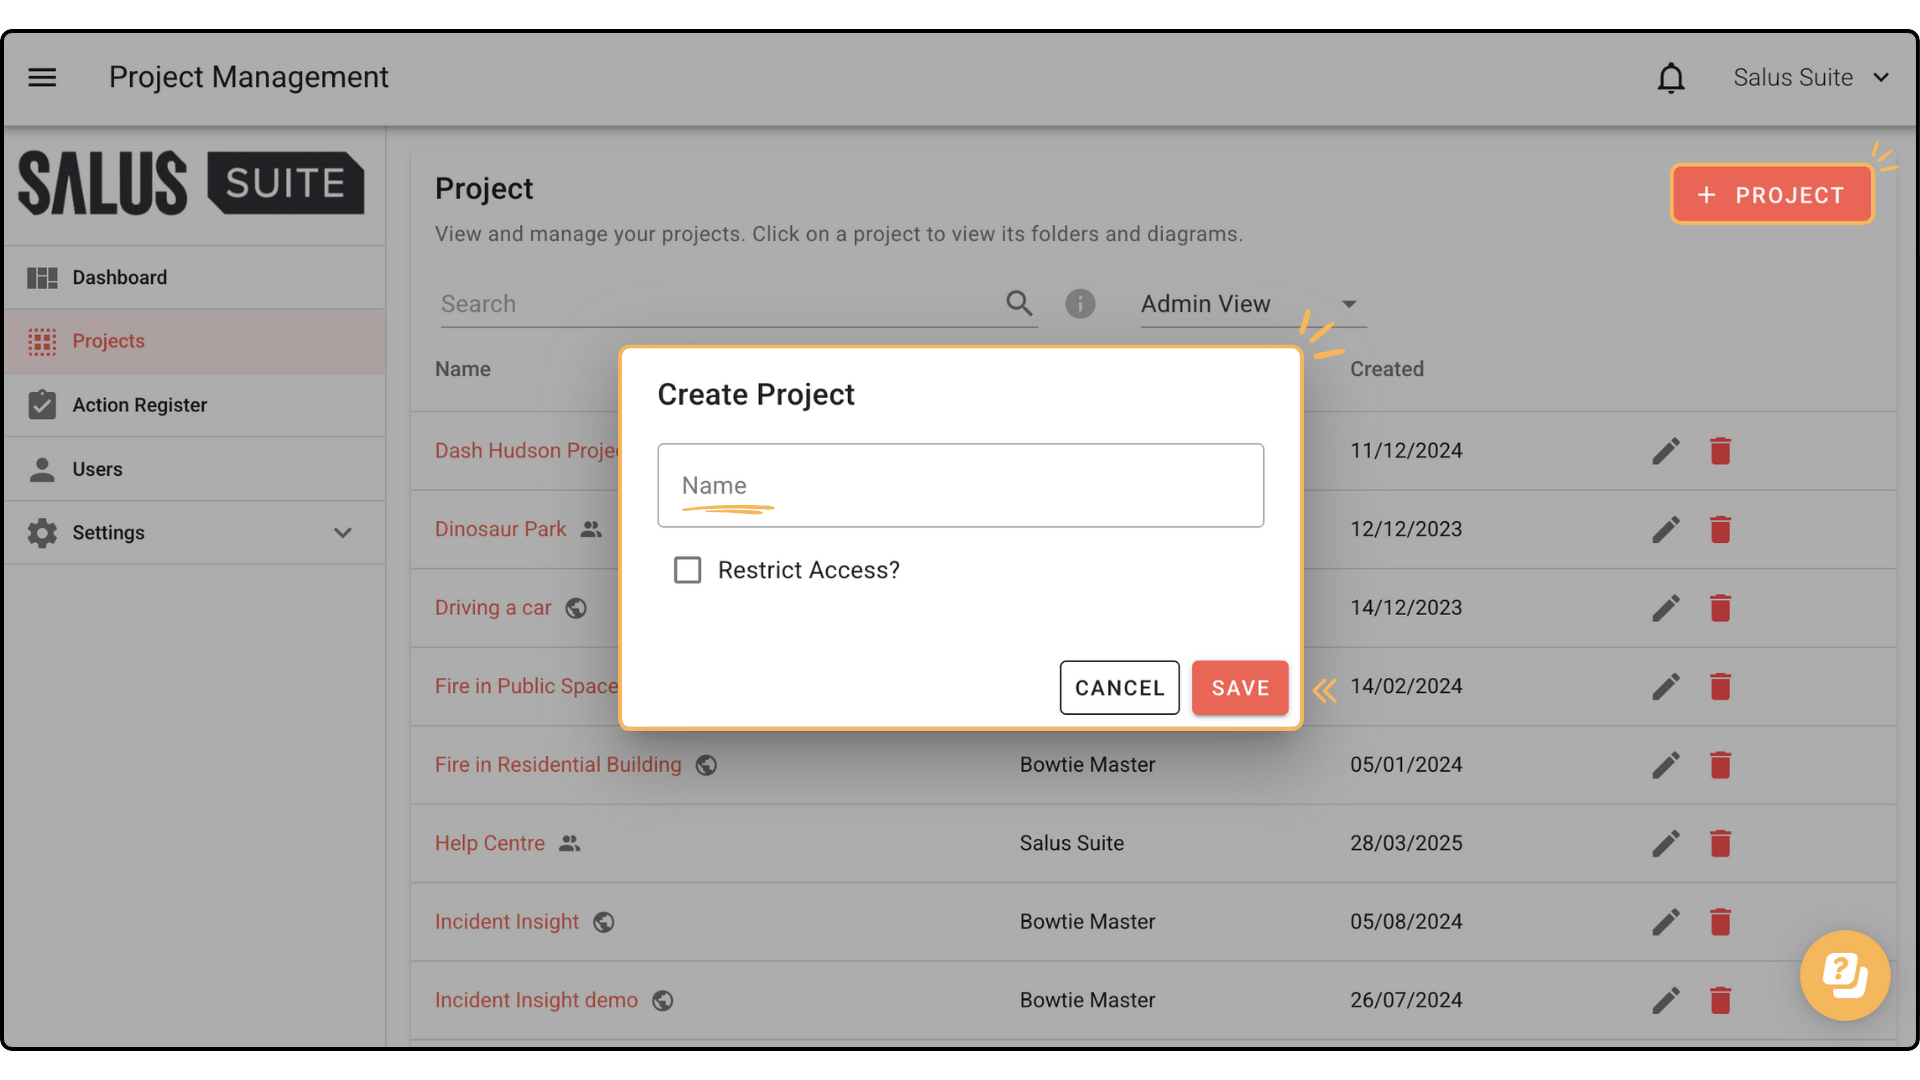
Step 2: In the newly created project, click + DIAGRAM. Enter a diagram name, select Bowtie in the Diagram Type, and choose a template, if there is one you are using. If not, leave this field blank. Click CREATE. 
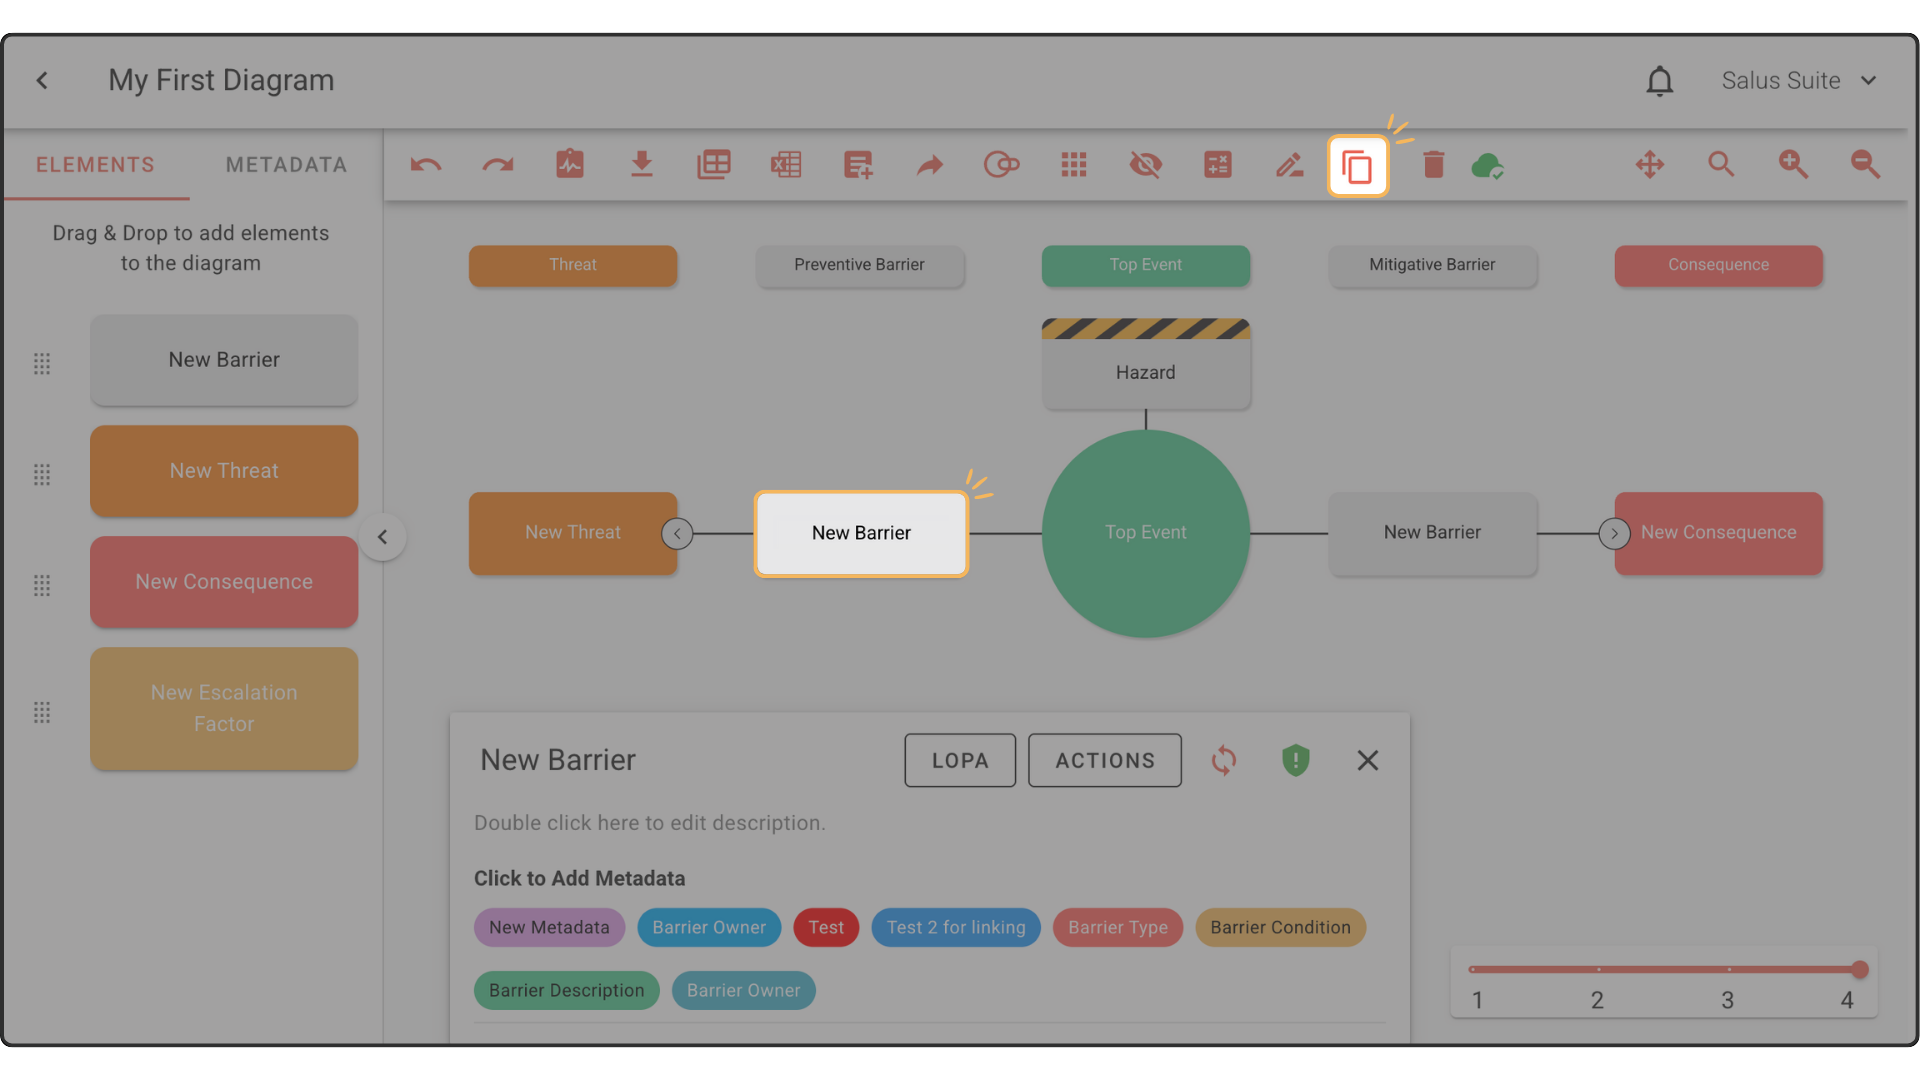
Step 3: Drag and drop elements from the left-hand side of the Diagram Editor into the diagram. Start by placing a Threat on the left side or a Consequence on the right. Begin building out your bowtie, adding barriers to both sides of the diagram.
When dropping in elements to the diagram, ensure you pay attention to the dashed line which appears. Drop elements within this zone using the black bar as a placement indicator. The Hazard and Top Event are already placed in the diagram by default.

Step 4: To edit an element’s content, double-click on the element. You can rename the element here.

Another way to edit an element’s content is through the Element Description Box at the bottom of the Diagram Editor. In the Element Description Box, you can rename the element, add a description, add metadata , add actions, and more.

Step 5: To delete an element, double-click on the element you wish to delete. Then click on the Delete Element button found on the toolbar.

To delete an entire node, double-click on the Threat or Consequence element of the node you wish to delete, and then click on the Delete Element button found on the toolbar. This action cannot be undone once saved. This will permanently delete the selected element and its children.

Step 6: To clone an element, double-click on the element you wish to duplicate and click on the Clone Element button in the toolbar.
If you wish to clone an entire node, click the associated Threat or Consequence and click the Clone Element button in the toolbar.