This help article will explain the two options we currently offer for diagram backup and data import. If you have further questions which are not answered in this article, please get in touch with our team.
Backup your diagram
Bowtie Master provides users with the ability to easily backup and import the details that make up a bowtie diagram.
Note: The backup feature contains only your raw data. It won’t look like much, but it can be used to store your data outside of Bowtie Master. This file type can be re-uploaded into Bowtie Master by using the Import button in your project folder.
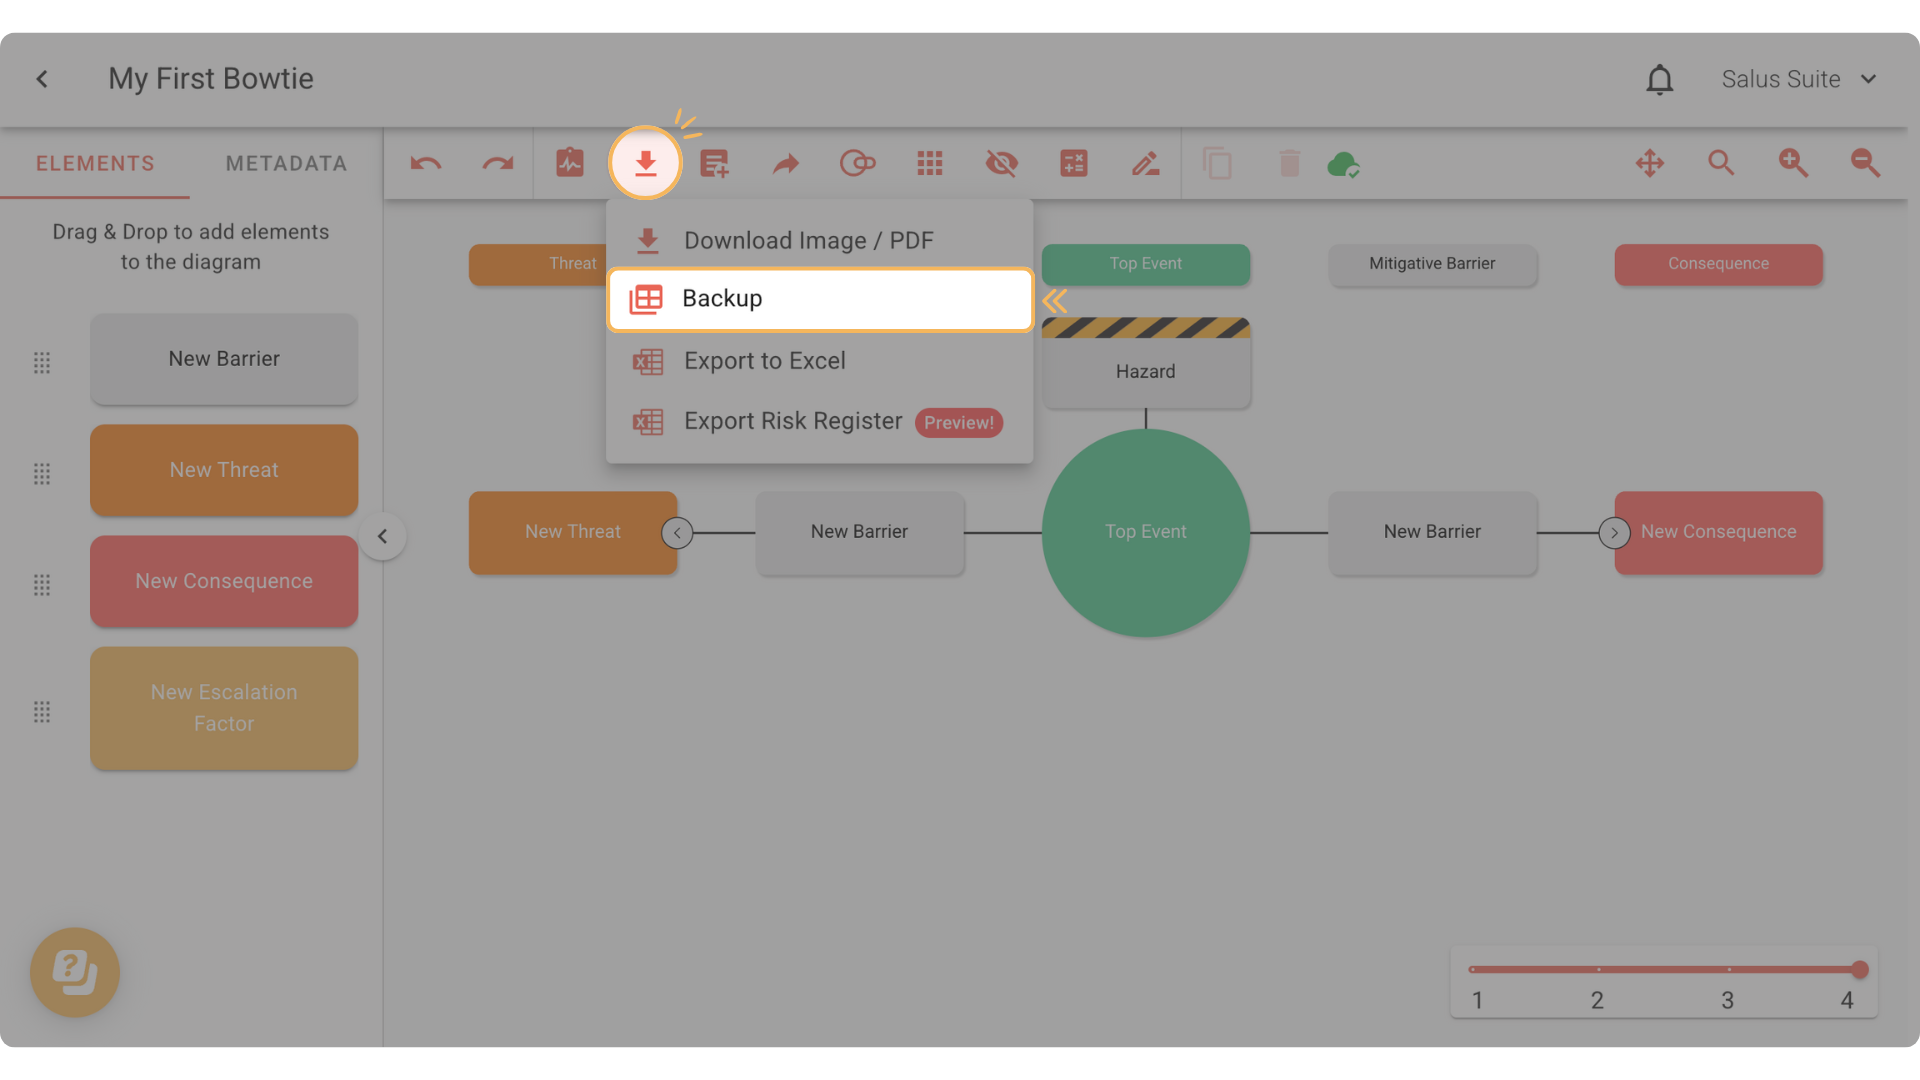
Step 1: Click on the Download Tool, then select Backup. The details that make up your bowtie diagram will be downloaded into an Excel file.
Import bowtie diagram data
The import feature allows users to easily incorporate their existing bowtie diagrams into the Bowtie Master software. Prior to importing data into Bowtie Master, an Excel spreadsheet template must be populated with the details that make up the diagram.
Step 1: Head to the main Project Menu and create a new project or open an existing project.
Step 2: Click on Import. In the dropdown, select Diagram.

Step 3: If you have no template yet, click on Download Template. If you have a template, proceed to Step 6.

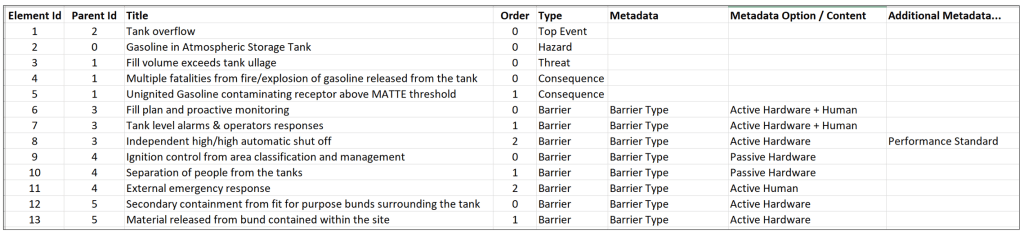
Step 4: Open up the Excel workbook downloaded. Click into the Diagram Elements tab of the workbook. Each element will have its own row where the following details must be populated.
- Element ID: Provide a unique ID
- Parent ID: Enter the ID of its parent element (i.e. the parent of a barrier will be either a threat or a consequence)
- Title: The text that will appear on the bowtie diagram element
- Order: The order in which the element will be displayed on the bowtie diagram
- Type: The element type for example Threat, Top Event, Barrier, Consequence etc
- Metadata: Additional details related to the barrier (Barrier Owner, Barrier Type etc)
- Metadata Options: If the selected metadata has multiple options, they can be included here for example Barrier Type could have the following options: Active Hardware, Passive Hardware, Active Hardware + Human.

The figure below provides an example of completed rows in the Diagram Elements tab.
Once the Diagram Elements tab is completed, save the workbook. It is now ready to be imported into Bowtie Master. Prior to saving the workbook, ensure that all the worksheet names are the same as the original workbook downloaded from the application.
Step 5: To import the Excel workbook, redo Steps 1 and 2 above.
Step 6: Upload the Excel workbook. Click Import.

The new bowtie diagram will now be visible in the project folder.


